Feeds:
Posts
Comments

Posts Tagged ‘recycling crafts’

The magazine is out.  I love the photos that Stampington took and included, the doll looks so nice!  I was flattered to be asked to include the doll in the Artist’s Emporium as well.  If you’d like to purchase her and make a nice donation to Art for Heart a portion of the proceeds will go to charity.

Thank you all for your visits, your kind comments, I feel very blessed.

Read Full Post »

trimmedeggs

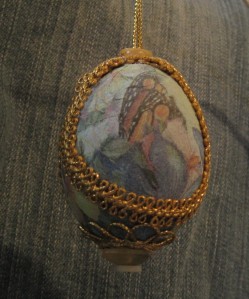
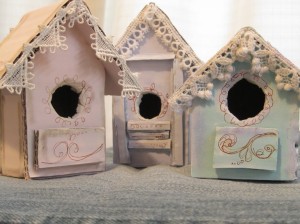
It’s fall here in Brazil, we’re getting colder at night and still I just can’t accept it.  With Easter just a week or so ago I can’t seem to reconcile myself to this side of the Equator.  So in my home it’s spring and we’re making little pastel houses and decorating eggs with vintage trim.

The little houses are upcycled cardboard with vintage lace.  I’m still at work on the birds who will live in these sweet little homes.

paper houses

Read Full Post »

We are away from home and family this holiday season.  It’s always hard for me this time of year – I know exactly what I am missing.  Somehow the weather just doesn’t feel like Christmas, growing up in Colorado I need at least a little snow to feel like I’m ready for Christmas and New Years.  As far as I know, Brazil doesn’t get snow, even during the ‘winter’.

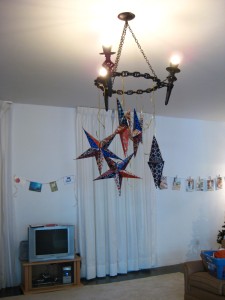
To make the house feel a little more festive and to help break out of my little funk I’ve done some decorating.  On Saturday my husband helped me make some paper stars from old wrapping paper and hang them from our absolutely horrific light fixture.

recycled wrapping paper stars

recycled wrapping paper stars

We also hung up some of our old Christmas cards.  I punch some holes in the top corners and then string them up around the house.  Most of the pictures have lovely winter scenes and snowy mountains.

Happy Holidays!

Read Full Post »

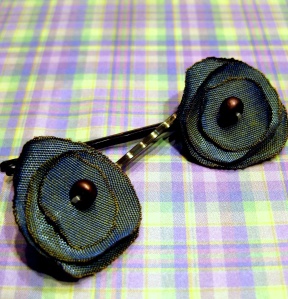
I found a new use for my silk fabric sample books.  I saw some of these chic little silk flower hair pins over on Etsy the other day and decided to try my hand at them.

Silk Flower Hair Pins

To begin I cut out some circles, three of varying sizes works best and makes the flower look really pretty. My largest circles are about 1 inch across.

Then with a candle you learn how to pass the edges of the circle through the flame until you’ve got a slight singe on all of the raw edges. This will be a learning process, be patient and cut a few extras so you have some practice circles.

Next take some thread and secure all the circles together and add a center bead.  Pass through the flowers and bead twice before attaching to the hair pin.

Add the hair pin and wrap 4 times, tie a good square knot and glue.  I used a multi-purpose glue that is more gel than liquid, that way it doesn’t leak through the fabric and stain the flower.  Once you’ve got a good secure attatchment to the hair pin clip the threads and wear.

This little project is good for head bands and little clips as well.  This is such a great way to use up some scraps you might have around your house.

Read Full Post »

A few weeks ago I was surfing around Etsy, which is what I do when I’m procrastinating about my messy house or the dishes that still haven’t been washed, or the blogging I’ve not gotten around to.  Anyway, I do this alot and I have a new favorite recycling artist.  His shop is Dank Artistry and I want to be his new best friend.

I looked through his site and ended up with a long list of all the rings and bracelets I wanted and then I remembered a very unsucessful little foray into spoon rings during college.

My mother gave me some spoons to work with, they belonged to my Grandma.  They were those lovely Reed and Barton flower dessert spoons.  Well I made my mom and sister a couple of key rings and then I attempted to make a bracelet for my self.  After a very messy solder joint and some damage to the silver plating I had a bracelet that I’ve worn no more than a dozen times since (yeah that was 10 years ago).

Well thanks to the power of Alchemy I asked Dank to help me  fix the mess I’d made all those years ago.  And today I received the finished pictures of his work… I am speachless, he made them sparkle, they look so pretty and I will be able to wear them, and now I have two little rings that I can pass on to my two little daughters.

Please visit his site, and if you’ve the inclination – give him some business.  He’s very talented and friendly, the communication was excellent, and his prices are wonderfully reasonable.

Read Full Post »

I’m working on a new banner, it’s my favorite theme right now.  This banner is made up of stars and a little bit of free-form poetry.  Over a year ago my daughter got a Piggy bank in a really nice clear plastic box, up until last week I was storing quilt blocks in it.  They have a new home and the box was too nice to waste.  So I cut some star shapes, sanded the front and back to help the paint adhere, and had a lot of fun with some of my toys.

Ah, the vindication of a pack-rat.

Read Full Post »

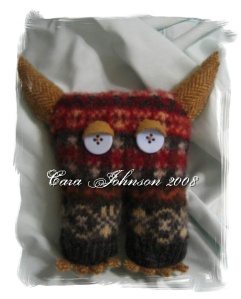
recycled wool sweater monster

recycled wool sweater monster

I loved that song when I was a child at Halloween, we had a old cassette tape of songs and I was thinking of what my plans were going to be for Halloween this year. I’ve got some ideas for my girls and a few funny ideas for my husband and I, funny how he never seems to go for my ideas… hee! hee!

Anyway, I was working on some items for my shop for Halloween and came up with this little guy, sure he looks shy and retiring, but you should see the size of his teeth when he opens his mouth.

This little guy was made from a the sleeve of a wool sweater, be sure to shrink and felt the sweater and then cut about 6 inches of the sleeve. Cut a short split up the middle of the front and back, stitch closed into legs. Close up the feet and then stuff and close up the head. Horns were made from triangles of a wool suit, use suit buttons or what ever cute little eyes you can.

Read Full Post »

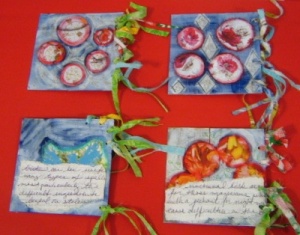
Magic chunkies art swap

Magic chunkies art swap

I’ve finally started to feel settled a bit, and I’ve returned to one of my life-lines from our days in Bogota, joining an Art Swap. I joined an ATC group after the first year away from the states as a way to feel connected to other artists, especially english-speaking artists. I wish my language skills were sufficient to find artsy friends in the wonderful places we’ve lived but life seems to find a way of getting between me and language classes.

I like thinking about the theme and then trying new things out to get my swap submissions ready to go. With the mail situation, I’ve also learned that waiting til the last minute is a sure-fire way to loose potential friends. I love getting things in the mail and I am excited for weeks waiting to see my trades… Overall I’ve always been surprised and very rarely disappointed.

I’ve done doll swaps and ATCs and now I’ve added chunkies to my list. I try not to overcommit, but sign up for one or two a month, then I check in to the forums to see if others have posted pics of their finished work. I love when a swap has a lot of lively interaction, it’s great to see the instant commraderie…

So, with a little work this weekend, and the use of a few magazines, cereal boxes and the scraps from my last forray into purse making… here is a few pics of the chunkie trades.

Read Full Post »

So I’ve been writing about what I’ve been doing to keep my hands out of trouble as we travel and here is the first little collection of my Flash Card art.  Read the Tips for more info.

Read Full Post »

I wanted to share some of the things of learned as a ‘traveling crafter’.  I’ve been vacationing and my crafts have been limited to one duffle bag.  I struggle with this as I really like to spread out and I’m afraid I’ve been spoiled to have a whole room in the last 2 years.  

Necessity being the mother of invention, I wanted to share some of the things I’ve learned:

  • I packed more tools than anything else: paint brushes, hole punch, files, wire working pliers, scissors, needles etc. – this way when I get to my destination and I do some thrifting or borrow from my mom’s stash I can actually do some things where maybe the raw materials didn’t fit into my bag.
  • Watercolors are great – and so cheap for $.99 you can get RoseArt watercolors, which has been fun for me and for my 3 year old.
  • Second-hand flash cards are a fun canvas for small portable art.  I picked up a bag of flash cards from the thrift store and have decorated them with Gesso, water colors, colored pencils, buttons, glitter, see the photo.
  • Buttons are great for making art too.  String them together, decorate your shoes, embellish a sweater or just decorate the buttons themselves.  A few weeks ago I noticed an Ebay auction where the seller had used permenate markers, glitter, jewels, paper, fabric etc to decorate a batch of buttons.  This one was fun for me and the 3 year old as well.

Read Full Post »

Older Posts »